Using the Spotify API with your Android application: the essentials
by Silas Stulz
Overview
In this tutorial, I will show you how to interact with the Spotify API. How to authenticate, make calls, and parse the results. We are going to discover what the Spotify API is capable of, what kind of information is available and also what kind of manipulations we can do with it.
Although it is a REST API and therefore works the same for every client, the authentication differs widely for iOS, Android and Web. So, in this post, we are going to focus on Android authentication. The calls we are going to make to the API can also be used the same way in iOS or a web application. To create the calls on Android, we are going to use the widely known volley framework ( https://github.com/google/volley).
So, let's get going!
Disclaimer: The Spotify API is subject to change, so in the feature, these calls may not work anymore or have to be changed as well. Check out the official documentation if problems occur.
https://developer.spotify.com/documentation/web-api
Creating a Spotify API project
First, we need to create a Spotify API project to allow us to authenticate with it. To do that, we head to https://developer.spotify.com/dashboard and login with our Spotify account.
Now we have to execute the following steps:
- On the right top corner clicking on “create a client ID”
- Filling out the form, name, description and what we are building (Mobile App)
- Answering if we are developing a commercial integration. Answer: NO.
- Accepting the terms of service.
Now we have to add a redirect URI to our whitelist. To do that, let’s go to “edit settings” and there under “Redirect URIs” we add the package name to redirect. For example, in my case, this would be “com.spotifyapiexample://callback”. Be aware that it is not allowed to have underscores in the URI. It’s also possible to do this later after the package name is known, but it has to be done before we first run the application.
Great, now that we have done this, we can proceed with our Android project.
Creating an Android project
Let’s create a basic android project with an empty activity. I will call mine Spotify_api_example. Feel free to choose your name. If you haven’t yet whitelisted your application, now is the time to do it with “<your_packagename>://callback”
First, we need to add the Spotify Android auth library to our project. Download the project from https://github.com/spotify/android-auth/releases. Unzip the folder and copy the folder into the /app/libs directory in your project’s root directory.
Then open your build.gradle (Module: app) file and add the dependency on the library:
dependencies {
    implementation fileTree(dir: 'libs', include: ['*.jar'])
    implementation 'com.spotify.android:auth:1.1.0'
    implementation 'com.android.support:appcompat-v7:28.0.0'
    implementation 'com.android.support.constraint:constraint-layout:1.1.3'
    testImplementation 'junit:junit:4.12'
    implementation "com.google.code.gson:gson:2.8.5"
    implementation 'com.android.volley:volley:1.1.1'
    androidTestImplementation 'com.android.support.test:runner:1.0.2'
    androidTestImplementation 'com.android.support.test.espresso:espresso-core:3.0.2'
}
Authenticate and getting user information
Now, let’s create a new activity (empty activity), I’ll call it SplashActivity. In this activity, we are going to do three things: Authenticate the Spotify API, get some information about the current user, and redirect to the main activity after we fetched the token and the information.
First, open your AndroidManifest.xml and change the launching activity to our newly created SplashActivity. Additionally, add internet permission to the manifest, so we can communicate with the outside world.
<?xml version="1.0" encoding="utf-8"?>
<manifest xmlns:android="http://schemas.android.com/apk/res/android"
    package="com.spotify_api_example">

    <uses-permission android:name="android.permission.INTERNET" />

    <application
        android:allowBackup="true"
        android:icon="@mipmap/ic_launcher"
        android:label="@string/app_name"
        android:roundIcon="@mipmap/ic_launcher_round"
        android:supportsRtl="true"
        android:theme="@style/AppTheme">
        <activity android:name=".SplashActivity">
            <intent-filter>
                <action android:name="android.intent.action.MAIN" />
                <category android:name="android.intent.category.LAUNCHER" />
            </intent-filter>
        </activity>
        <activity android:name=".MainActivity"></activity>
    </application>
</manifest>
Now open your SplashActivity. Let’s create a new method called authenticateSpotify().
 private void authenticateSpotify() {
        AuthenticationRequest.Builder builder = new AuthenticationRequest.Builder(CLIENT_ID, AuthenticationResponse.Type.TOKEN, REDIRECT_URI);
        builder.setScopes(new String[]{SCOPES});
        AuthenticationRequest request = builder.build();
        AuthenticationClient.openLoginActivity(this, REQUEST_CODE, request);
}- First, we open an AuthenticationRequest with our ClientID, the response type we want (in this case an authentication token) and the RedirectURI ( This URI has to be whitelisted in our project at https://developer.spotify.com/dashboard)
- Then we set our requested scopes (e.g. user-read-recently-played). These are different permissions we need to request from the user, for example, the permission to read his personal information. The requested scopes will be displayed to the user and he has to grant them to your application.
- Finally, we send the request. This will open Spotify (if it’s installed) or fall back to a WebView where the user has to log in. The REQUEST_CODE is just a static number (e.g. 1337) to identify the application we just started.
While we’re on it, let’s define a few constants we are going to need. Replace them with your ClientID and RedirectURI. You can find the ClientID in your Spotify Dashboard.
private static final String CLIENT_ID = <YOUR CLIENT_ID>;
private static final String REDIRECT_URI = <YOUR REDIRECT_URI>;
private static final int REQUEST_CODE = 1337;
private static final String SCOPES = "user-read-recently-played,user-library-modify,user-read-email,user-read-private";
Now, when the user logged in. He will be redirected to your application. That’s where we will receive the token if the request was successful. Add the following to the SplashActivity class:
@Override
    protected void onActivityResult(int requestCode, int resultCode, Intent intent) {
        super.onActivityResult(requestCode, resultCode, intent);

        // Check if result comes from the correct activity
        if (requestCode == REQUEST_CODE) {
            AuthenticationResponse response = AuthenticationClient.getResponse(resultCode, intent);

            switch (response.getType()) {
                // Response was successful and contains auth token
                case TOKEN:
                    editor = getSharedPreferences("SPOTIFY", 0).edit();
                    editor.putString("token", response.getAccessToken());
                    Log.d("STARTING", "GOT AUTH TOKEN");
                    editor.apply();
                    waitForUserInfo();
                    break;

                // Auth flow returned an error
                case ERROR:
                    // Handle error response
                    break;

                // Most likely auth flow was cancelled
                default:
                    // Handle other cases
            }
        }
    }
The user gets redirected back from the Spotify API. Then your application identifies the RequestCode, so it is clear that it is redirected from Spotify. Then the application checks if it received a token and proceeds accordingly. We save the token in our persistent storage with SharedPreferences (https://developer.android.com/reference/android/content/SharedPreferences). Be sure to check out the comments for further explanation about what is happening.
Lastly, we have to initialize our Shared Preferences and call the authenticateSpotify() method. Add the following code to your SplashActivity:
public class SplashActivity extends AppCompatActivity {

    private SharedPreferences.Editor editor;
    private SharedPreferences msharedPreferences;

    private RequestQueue queue;

    private static final String CLIENT_ID = "3a7b0154a0fd4a868e41d59834f97bd5";
    private static final String REDIRECT_URI = "com.spotifyapiexample://callback";
    private static final int REQUEST_CODE = 1337;
    private static final String SCOPES = "user-read-recently-played,user-library-modify,user-read-email,user-read-private";

    @Override
    protected void onCreate(Bundle savedInstanceState) {
        super.onCreate(savedInstanceState);
        requestWindowFeature(Window.FEATURE_NO_TITLE);
        getSupportActionBar().hide();
        setContentView(R.layout.activity_splash);


        authenticateSpotify();

        msharedPreferences = this.getSharedPreferences("SPOTIFY", 0);
        queue = Volley.newRequestQueue(this);
    }

    ....
Congrats! We now received our valid API Token and we can start using the Spotify API. If you like to try it out, uncomment the waitForUserInfo(); call in onActivityResult. You should be able to log in with your Spotify account. But sadly nothing else will happen yet.
The first call we are going to make is getting some information about our user. For example, if you want to keep track of who is using your application. You can identify your users with their unique Spotify ID.
Let’s start by creating a model for our users with the information we are going to receive from the Spotify API. Create a new class called “User“ and add the following code:
public class User {
public String birthdate;
public String country;
public String display_name;
public String email;
public String id;
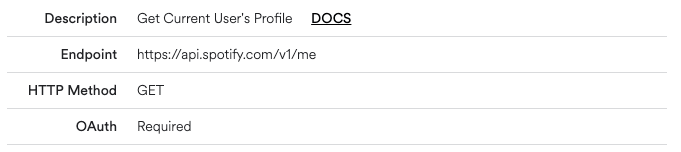
}Now, to keep things structured, let’s create a service class for every API endpoint we are going to use. Create a new package called “Connectors” and create a new class called “UserService” and add the following code:
public class UserService {

    private static final String ENDPOINT = "https://api.spotify.com/v1/me";
    private SharedPreferences msharedPreferences;
    private RequestQueue mqueue;
    private User user;

    public UserService(RequestQueue queue, SharedPreferences sharedPreferences) {
        mqueue = queue;
        msharedPreferences = sharedPreferences;
    }

    public User getUser() {
        return user;
    }

    public void get(final VolleyCallBack callBack) {
        JsonObjectRequest jsonObjectRequest = new JsonObjectRequest(ENDPOINT, null, response -> {
            Gson gson = new Gson();
            user = gson.fromJson(response.toString(), User.class);
            callBack.onSuccess();
        }, error -> get(() -> {

        })) {
            @Override
            public Map<String, String> getHeaders() throws AuthFailureError {
                Map<String, String> headers = new HashMap<>();
                String token = msharedPreferences.getString("token", "");
                String auth = "Bearer " + token;
                headers.put("Authorization", auth);
                return headers;
            }
        };
        mqueue.add(jsonObjectRequest);
    }


}
If we look at the Spotify API documentation, we see that the request is pretty basic. It’s a standard GET request to the Endpoint and we only need our Bearer token (the one we received in our last step) as a header. No additional parameters are required.
Here, we are generating a basic GET Request with a JsonObjectRequest. We simply parse the result with Gson and our created user class. So we create a new user object, and as soon as we get a response from the API we fill the values of our object with the result. The VolleyCallBack interface helps us to know when we received a valid response and we can proceed accordingly.
To get our callback working, we create a new interface called “VolleyCallBack”
public interface VolleyCallBack {

    void onSuccess();
}
We only need one method, to notify us, when the request was successful and we received a response.
Now we need to implement our method waitForUserInfo() in our SplashActivity class.
private void waitForUserInfo() {
UserService userService = new UserService(queue, msharedPreferences);
userService.get(() -> {
User user = userService.getUser();
editor = getSharedPreferences("SPOTIFY", 0).edit();
editor.putString("userid", user.id);
Log.d("STARTING", "GOT USER INFORMATION");
// We use commit instead of apply because we need the information stored immediately
editor.commit();
startMainActivity();
});
}
private void startMainActivity() {
Intent newintent = new Intent(SplashActivity.this, MainActivity.class);
startActivity(newintent);
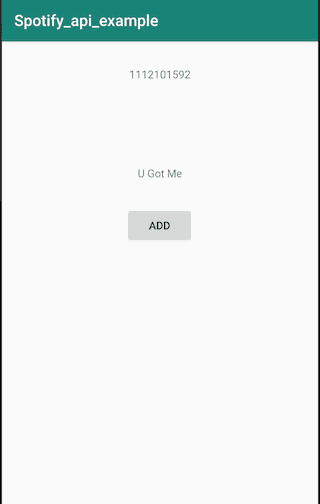
}Now if you start your application you should get your token, get the user information and should be redirected to the MainActivity, which will only display “Hello World!”. In the background, your application fetched a valid authentication token and requested additional information about the logged-in user. The Spotify ID is saved in the persistent storage, so we can access it again later. We just need to display the information.
We are not going to build a big user interface, the main goal of this tutorial is to show you how you can get the data, what you do with it is up to you.
Fetching recently played songs
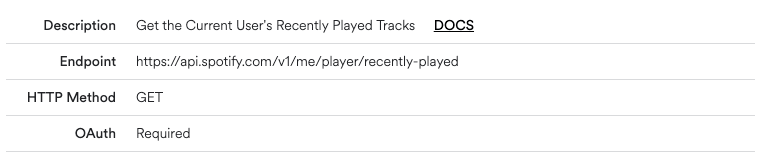
Now that we received the token and the user information, it’s time to use another API endpoint. We are going to fetch the recently played songs of the user. Build a new model for your Songs, similar to the User model we already created.
public class Song {

    private String id;
    private String name;

    public Song(String id, String name) {
        this.name = name;
        this.id = id;
    }

    public String getId() {
        return id;
    }

    public void setId(String id) {
        this.id = id;
    }

    public String getName() {
        return name;
    }

    public void setName(String name) {
        this.name = name;
    }

}
Following that, let’s create a very simple UI to display the Spotify ID, a title of a song and a button.
<?xml version="1.0" encoding="utf-8"?>
<android.support.constraint.ConstraintLayout xmlns:android="http://schemas.android.com/apk/res/android"
    xmlns:app="http://schemas.android.com/apk/res-auto"
    xmlns:tools="http://schemas.android.com/tools"
    android:layout_width="match_parent"
    android:layout_height="match_parent"
    tools:context=".MainActivity">

    <TextView
        android:id="@+id/user"
        android:layout_width="wrap_content"
        android:layout_height="wrap_content"
        app:layout_constraintBottom_toBottomOf="parent"
        app:layout_constraintLeft_toLeftOf="parent"
        app:layout_constraintRight_toRightOf="parent"
        app:layout_constraintTop_toTopOf="parent"
        app:layout_constraintVertical_bias="0.056" />

    <TextView
        android:id="@+id/song"
        android:layout_width="wrap_content"
        android:layout_height="wrap_content"
        android:layout_marginStart="8dp"
        android:layout_marginEnd="8dp"
        android:text=""
        app:layout_constraintBottom_toTopOf="@+id/add"
        app:layout_constraintEnd_toEndOf="parent"
        app:layout_constraintStart_toStartOf="parent"
        app:layout_constraintTop_toBottomOf="@+id/user"
        app:layout_constraintVertical_bias="0.762" />

    <Button
        android:id="@+id/add"
        android:layout_width="wrap_content"
        android:layout_height="wrap_content"
        android:layout_marginStart="8dp"
        android:layout_marginEnd="8dp"
        android:layout_marginBottom="340dp"
        android:text="Add"
        app:layout_constraintBottom_toBottomOf="parent"
        app:layout_constraintEnd_toEndOf="parent"
        app:layout_constraintHorizontal_bias="0.498"
        app:layout_constraintStart_toStartOf="parent" />


</android.support.constraint.ConstraintLayout>
Now let’s write two new methods and initialize our UI elements.
public class MainActivity extends AppCompatActivity {

    private TextView userView;
    private TextView songView;
    private Button addBtn;
    private Song song;

    private SongService songService;
    private ArrayList<Song> recentlyPlayedTracks;

    @Override
    protected void onCreate(Bundle savedInstanceState) {
        super.onCreate(savedInstanceState);
        setContentView(R.layout.activity_main);

        songService = new SongService(getApplicationContext());
        userView = (TextView) findViewById(R.id.user);
        songView = (TextView) findViewById(R.id.song);
        addBtn = (Button) findViewById(R.id.add);

        SharedPreferences sharedPreferences = this.getSharedPreferences("SPOTIFY", 0);
        userView.setText(sharedPreferences.getString("userid", "No User"));

        getTracks();
    }


     private void getTracks() {
        songService.getRecentlyPlayedTracks(() -> {
            recentlyPlayedTracks = songService.getSongs();
            updateSong();
        });
    }

    private void updateSong() {
        if (recentlyPlayedTracks.size() > 0) {
            songView.setText(recentlyPlayedTracks.get(0).getName());
            song = recentlyPlayedTracks.get(0);
        }
    }

}
In our getTracks() method, we call our SongService method which will fetch the songs from the API. After we received the data we are going to update the name of the song with our updateSong() method.
We need a new class called SongService where we will fetch the songs from the Spotify API. This class is similar to the UserService we implemented and handles the request we send out to the API.
Again, if we look at the Spotify API documentation, we see that it’s a simple GET request, with no required parameters except our Bearer token in the header.
A typical response would look like this:
{
  "items": [
    {
      "track": {
        "album": {
          "album_type": "album",
          "artists": [
            {
              "external_urls": {
                "spotify": "https://open.spotify.com/artist/3b8QkneNDz4JHKKKlLgYZg"
              },
              "href": "https://api.spotify.com/v1/artists/3b8QkneNDz4JHKKKlLgYZg",
              "id": "3b8QkneNDz4JHKKKlLgYZg",
              "name": "Florida Georgia Line",
              "type": "artist",
              "uri": "spotify:artist:3b8QkneNDz4JHKKKlLgYZg"
            }
          ],
          "available_markets": [
            "AD",
            "AE",
           ...
          ],
          "external_urls": {
            "spotify": "https://open.spotify.com/album/64nhe9s692yKECAoMcEQ8U"
          },
          "href": "https://api.spotify.com/v1/albums/64nhe9s692yKECAoMcEQ8U",
          "id": "64nhe9s692yKECAoMcEQ8U",
          "images": [
            {
              "height": 640,
              "url": "https://i.scdn.co/image/c00437ea94a248c2df17756fae13c935c338de1d",
              "width": 640
            },
            {
              "height": 300,
              "url": "https://i.scdn.co/image/7888a491eea69a6dacfaad28d2f82e5530807b71",
              "width": 300
            },
            {
              "height": 64,
              "url": "https://i.scdn.co/image/b5c39f7fc6c302b3cd33d3190e8f178bd12712c5",
              "width": 64
            }
          ],
          "name": "Can't Say I Ain't Country",
          "release_date": "2019-02-15",
          "release_date_precision": "day",
          "total_tracks": 19,
          "type": "album",
          "uri": "spotify:album:64nhe9s692yKECAoMcEQ8U"
        },
        "artists": [
          {
            "external_urls": {
              "spotify": "https://open.spotify.com/artist/3b8QkneNDz4JHKKKlLgYZg"
            },
            "href": "https://api.spotify.com/v1/artists/3b8QkneNDz4JHKKKlLgYZg",
            "id": "3b8QkneNDz4JHKKKlLgYZg",
            "name": "Florida Georgia Line",
            "type": "artist",
            "uri": "spotify:artist:3b8QkneNDz4JHKKKlLgYZg"
          }
        ],
        "available_markets": [
          "AD",
         ...
        ],
        "disc_number": 1,
        "duration_ms": 202920,
        "explicit": false,
        "external_ids": {
          "isrc": "QM3E21802135"
        },
        "external_urls": {
          "spotify": "https://open.spotify.com/track/4qQwGRtGT7l6ckQtdPEFd4"
        },
        "href": "https://api.spotify.com/v1/tracks/4qQwGRtGT7l6ckQtdPEFd4",
        "id": "4qQwGRtGT7l6ckQtdPEFd4",
        "is_local": false,
        "name": "Talk You Out Of It",
        "popularity": 76,
        "preview_url": "https://p.scdn.co/mp3-preview/7020603485da5f0fe5ad387a667a92a3b1e7e187?cid=774b29d4f13844c495f206cafdad9c86",
        "track_number": 4,
        "type": "track",
        "uri": "spotify:track:4qQwGRtGT7l6ckQtdPEFd4"
      },
      "played_at": "2019-08-26T13:13:58.505Z",
      "context": null
    },
          ....
  ]
}
Let’s implement it in our SongService
public class SongService {
    private ArrayList<Song> songs = new ArrayList<>();
    private SharedPreferences sharedPreferences;
    private RequestQueue queue;

    public SongService(Context context) {
        sharedPreferences = context.getSharedPreferences("SPOTIFY", 0);
        queue = Volley.newRequestQueue(context);
    }

    public ArrayList<Song> getSongs() {
        return songs;
    }

    public ArrayList<Song> getRecentlyPlayedTracks(final VolleyCallBack callBack) {
        String endpoint = "https://api.spotify.com/v1/me/player/recently-played";
        JsonObjectRequest jsonObjectRequest = new JsonObjectRequest
                (Request.Method.GET, endpoint, null, response -> {
                    Gson gson = new Gson();
                    JSONArray jsonArray = response.optJSONArray("items");
                    for (int n = 0; n < jsonArray.length(); n++) {
                        try {
                            JSONObject object = jsonArray.getJSONObject(n);
                            object = object.optJSONObject("track");
                            Song song = gson.fromJson(object.toString(), Song.class);
                            songs.add(song);
                        } catch (JSONException e) {
                            e.printStackTrace();
                        }
                    }
                    callBack.onSuccess();
                }, error -> {
                    // TODO: Handle error

                }) {
            @Override
            public Map<String, String> getHeaders() throws AuthFailureError {
                Map<String, String> headers = new HashMap<>();
                String token = sharedPreferences.getString("token", "");
                String auth = "Bearer " + token;
                headers.put("Authorization", auth);
                return headers;
            }
        };
        queue.add(jsonObjectRequest);
        return songs;
    }

}
This time, parsing the result is a little bit more difficult than last time. Because we receive a JSON Array, we have to loop over every item in that array and assign the item to our song object. We do that like last time with Gson. In the end, we return an ArrayList of the type <Song> with our fetched songs from the API.
Now if you start the application you should see the name of a song you’ve listened to recently. We just display one. The button doesn’t do anything yet, so let’s change this.
Adding a Song to your liked Songs
Create an OnClicklistener for our button and assign it to our button.
@Override
protected void onCreate(Bundle savedInstanceState) {
super.onCreate(savedInstanceState);
setContentView(R.layout.activity_main);
songService = new SongService(getApplicationContext());
userView = (TextView) findViewById(R.id.user);
songView = (TextView) findViewById(R.id.song);
addBtn = (Button) findViewById(R.id.add);
SharedPreferences sharedPreferences = this.getSharedPreferences("SPOTIFY", 0);
userView.setText(sharedPreferences.getString("userid", "No User"));
getTracks();
addBtn.setOnClickListener(addListener);
}
private View.OnClickListener addListener = v -> {
songService.addSongToLibrary(this.song);
if (recentlyPlayedTracks.size() > 0) {
recentlyPlayedTracks.remove(0);
}
updateSong();
};
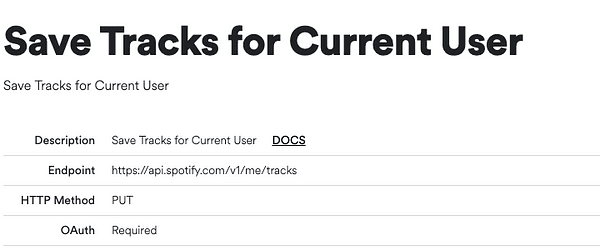
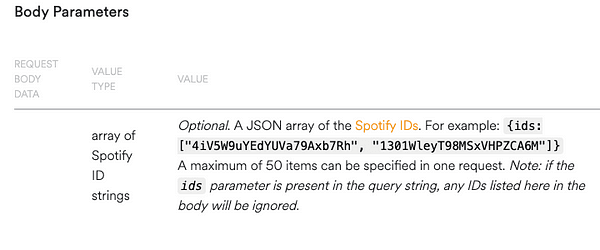
...We need to generate a PUT request. This time we have to provide a body, which has to include an array of Spotify ID strings. We will only include on ID in this array because we are going to generate a request for every song.
Edit the SongService class and add the following lines:
   public void addSongToLibrary(Song song) {
        JSONObject payload = preparePutPayload(song);
        JsonObjectRequest jsonObjectRequest = prepareSongLibraryRequest(payload);
        queue.add(jsonObjectRequest);
    }

    private JsonObjectRequest prepareSongLibraryRequest(JSONObject payload) {
        return new JsonObjectRequest(Request.Method.PUT, "https://api.spotify.com/v1/me/tracks", payload, response -> {
        }, error -> {
        }) {
            @Override
            public Map<String, String> getHeaders() throws AuthFailureError {
                Map<String, String> headers = new HashMap<>();
                String token = sharedPreferences.getString("token", "");
                String auth = "Bearer " + token;
                headers.put("Authorization", auth);
                headers.put("Content-Type", "application/json");
                return headers;
            }
        };
    }

    private JSONObject preparePutPayload(Song song) {
        JSONArray idarray = new JSONArray();
        idarray.put(song.getId());
        JSONObject ids = new JSONObject();
        try {
            ids.put("ids", idarray);
        } catch (JSONException e) {
            e.printStackTrace();
        }
        return ids;
    }
First, we prepare the body or here called payload. We generate a new JSONArray and add a single entry with our song ID. We wrap the whole thing in a JSONObject and the payload is ready.
Now we prepare the request we are going to send. This time it’s a PUT request so the method changed. Else, it’s similar to the other requests we already sent. Lastly, we add the request to our queue, so it will be asynchronously executed.
If you start the application, you should be able to see the song and if you press the add button it will add the song to your liked songs in your Spotify account, and a new song will be listed and you can again add it to your library. Go ahead and check if it worked.
Conclusion
This concludes this tutorial about the Spotify API. This was a small example of what is achievable with the Spotify API. The possibilities are nearly endless and maybe you got an idea of what you would like to do with it. Anyway, I wish you happy coding!
Check out my other Android project where I provide a lot more functions and calls with the Spotify API, like adding and deleting from playlists, playing songs and much more.
https://github.com/Hyferion/SpotifyRecLabelingAndroid
Also, you can find the code for this tutorial on Github: https://github.com/Hyferion/spotify_api_example
In my next post, I will talk about another application I developed on top of the Spotify API.